Mixamo to Unity
This covers how to get a 3D character into your scene, using Mixamo character assets and animations.
Mixamo has a few character assets (not its primary purpose) and a lot of animations for characters (its primary purpose).
Setup
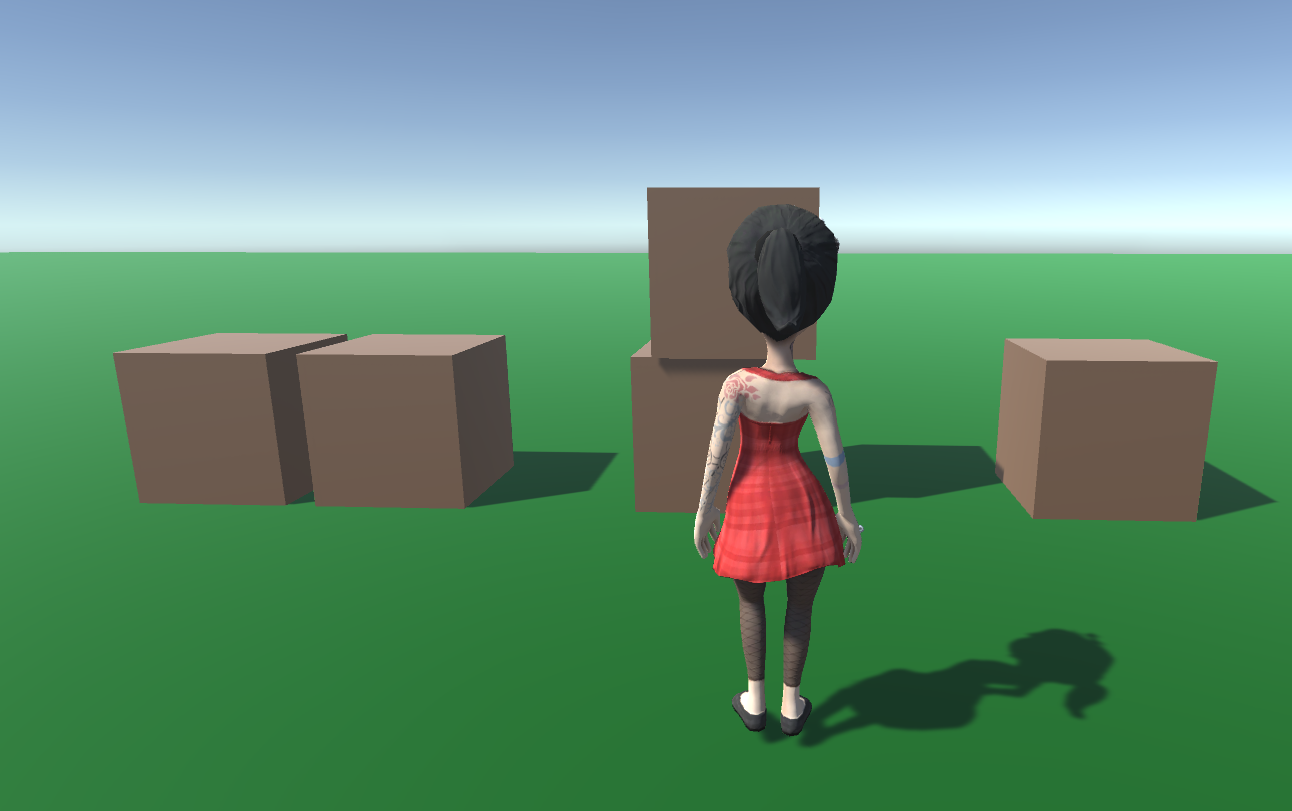
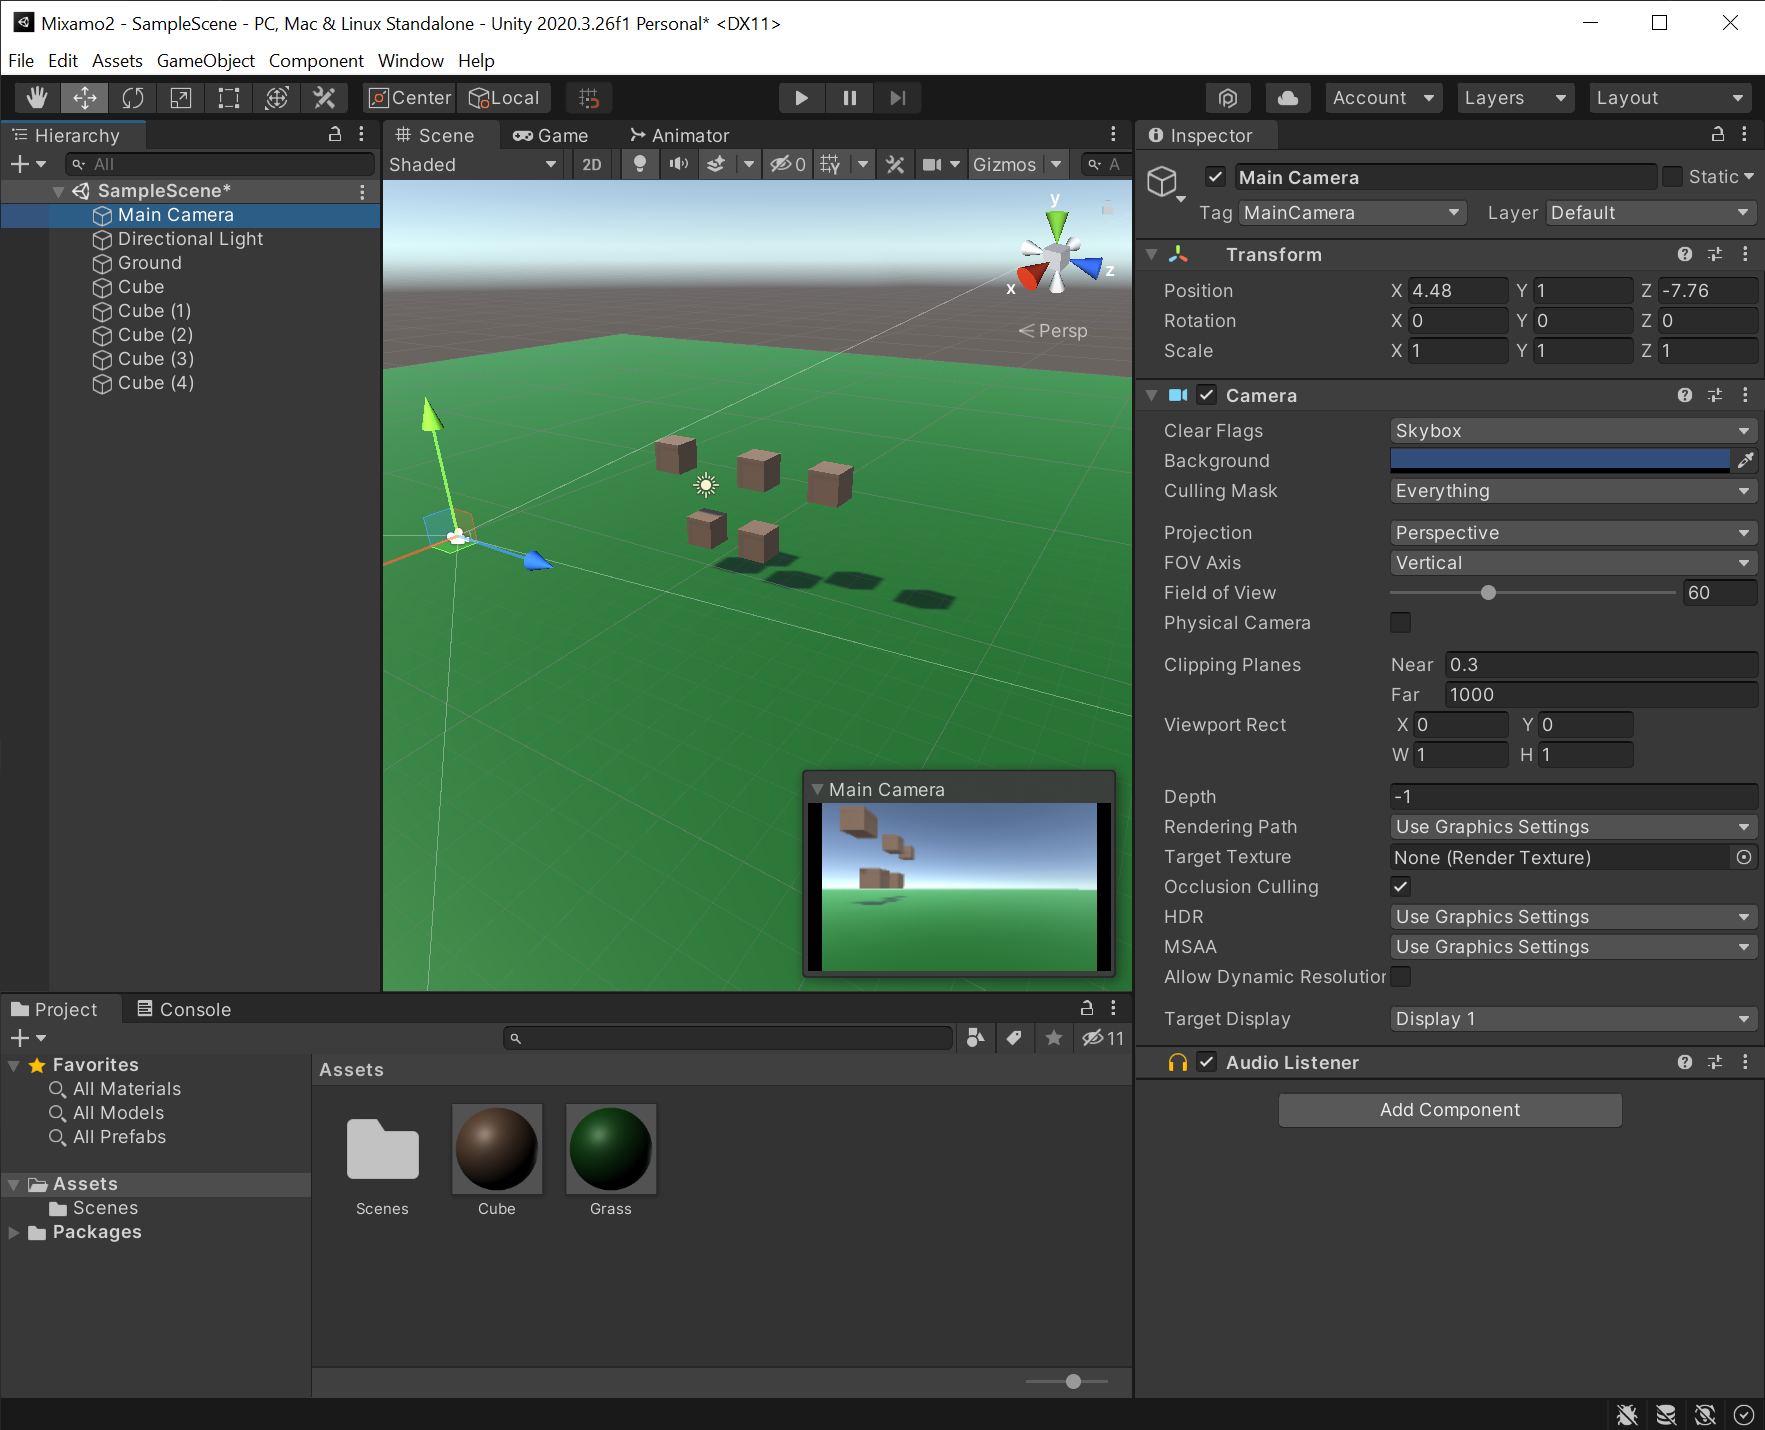
Our goal here is to create a landscape for our character to walk around. We’ll add a plane and have a few cubes to help with a sense of distance and perspective.
Create a new Unity 3D project
Add a plane, name it “Ground”
Scale x/z to 10x10
Create a grass material color
Add material to plane
Create a cube
Create a different material and add to cube
Add rigid body physics to cube. Test.
Duplicate a few cubes
Position the camera
Don’t forget to save
Download the Character from Mixamo
Go to Mixamo.com
Log in. You’ll log in with an Adobe id or some SSO choice they have.
Get the Character
Once there, go to the “Character” tab and find a character you like. I’m using Claire.
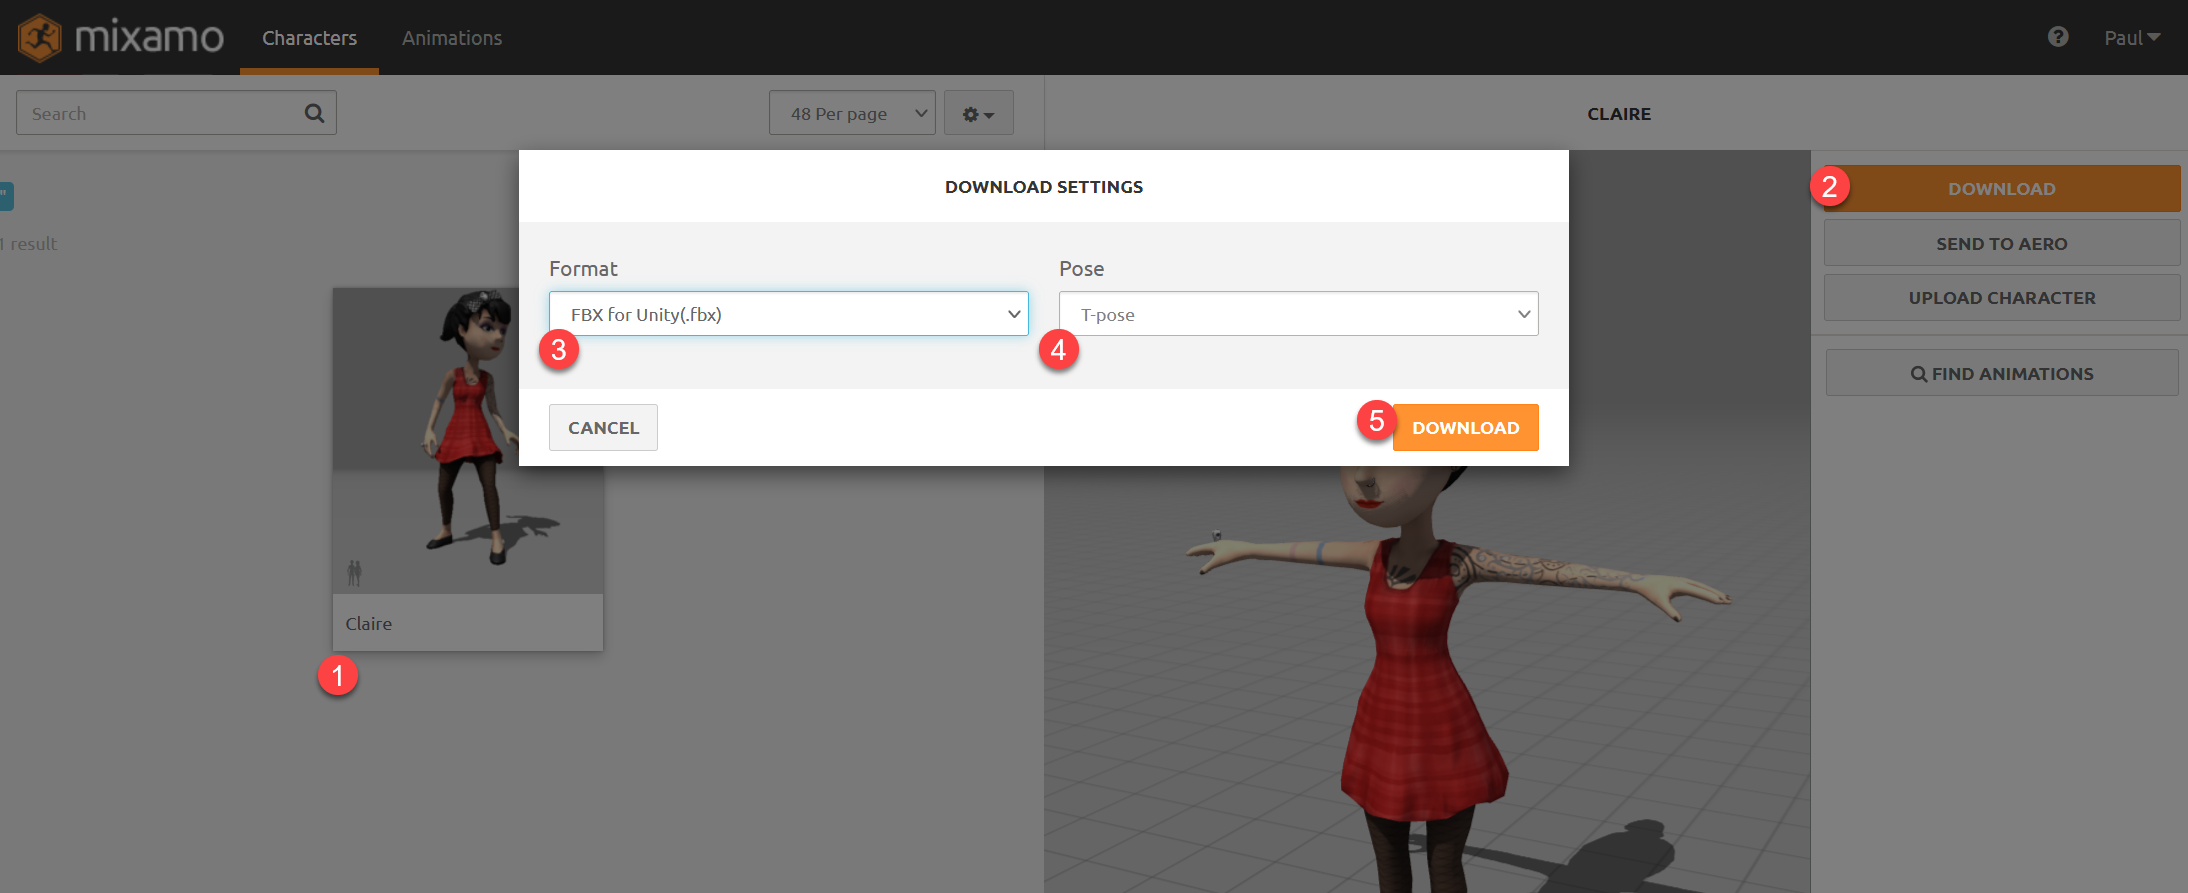
Select your character
Hit “Download”
You want “FBX for Unity”. You do not want the generic FBX it defaults to.
Make sure T-Pose is selected
Download
Get the Animations
Now we need our idle and walking animations.
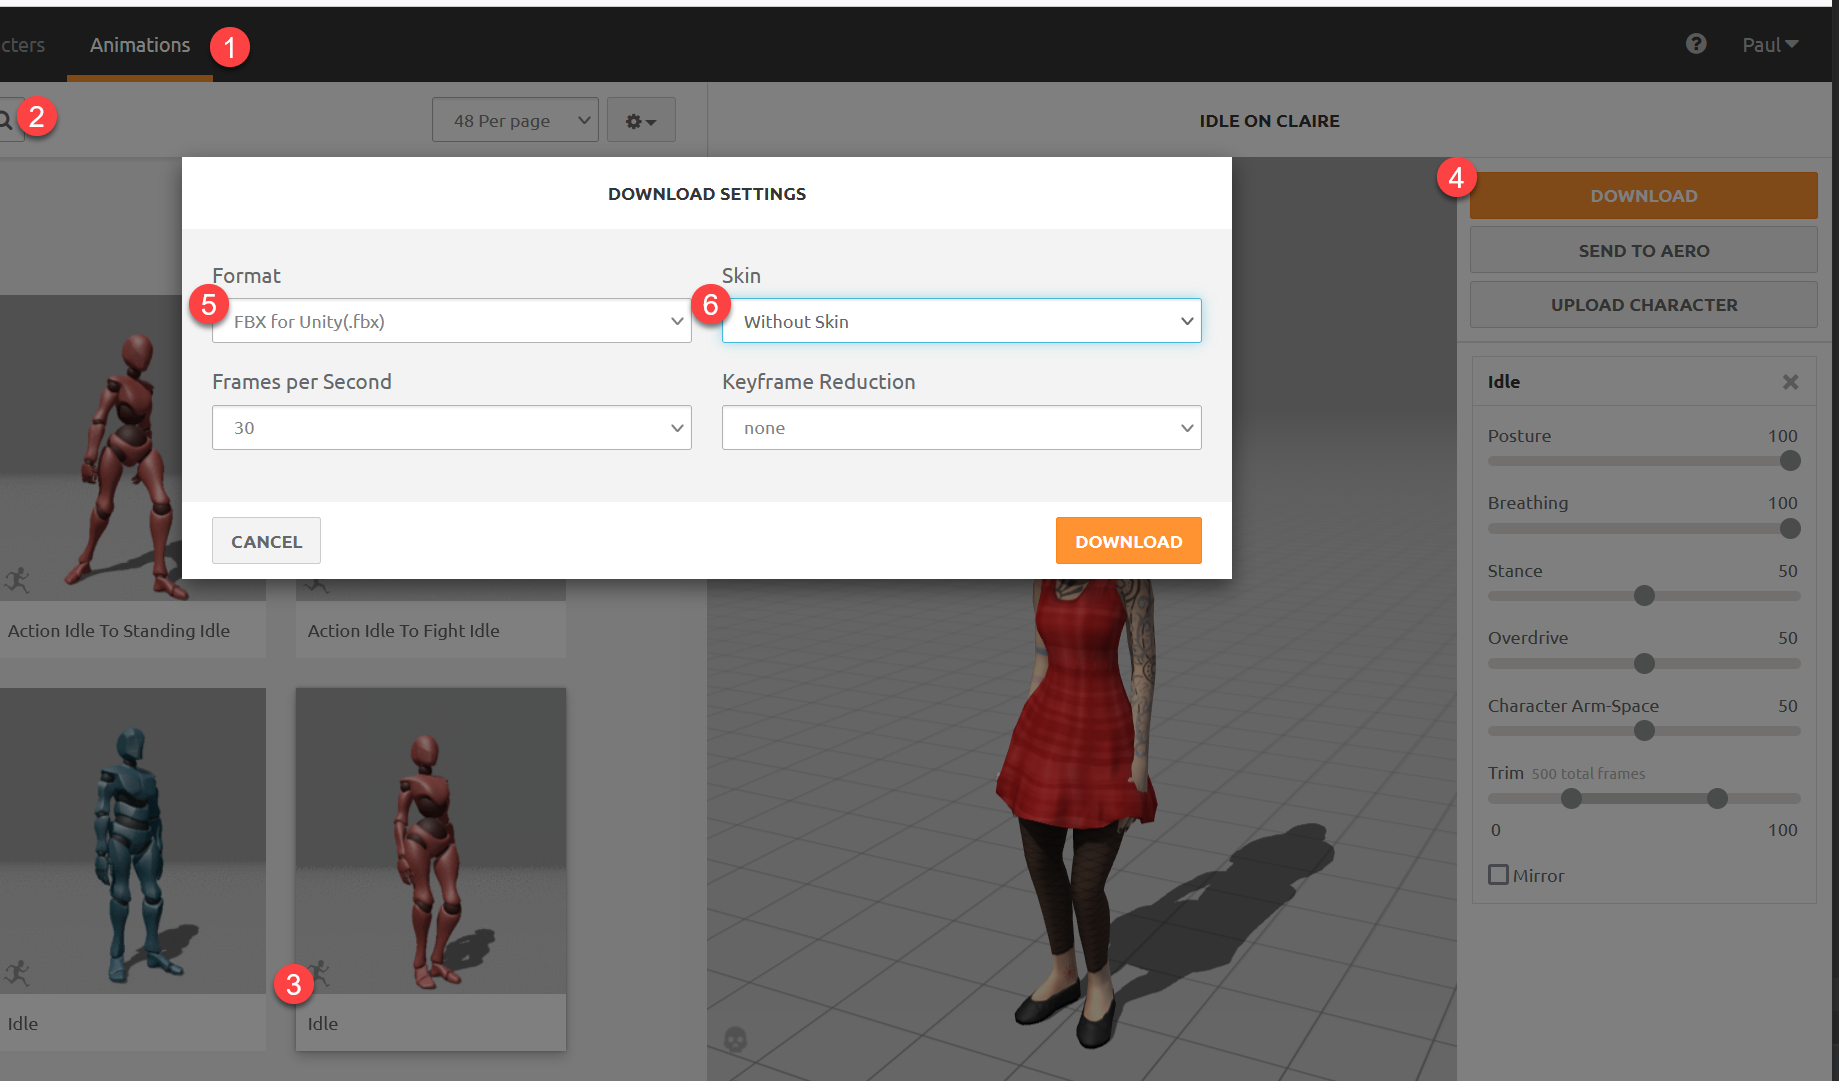
Switch to “Animations”
Search on “Idle”
Select an idle animation. If you don’t see it play with your character hit “refresh” on the browser. You can adjust the animation. For example, widen out the hands so they don’t clip through the characer.
Click “Download”
Select FBX for Unity. (Again, the default FBX doesn’t work.)
Select “Without Skin” because we already downloaded that.
Next, repeat for a walking animation. You’ll get an extra check-box for in-place which you must check. This will keep the animation from moving the character forward, while the code thinks the character is in the same location.
Warning
You must select “In-Place” checkbox for any moving animation
Add Mixamo Characters and Animations to Project
Now we want to get the character to appear in our project.
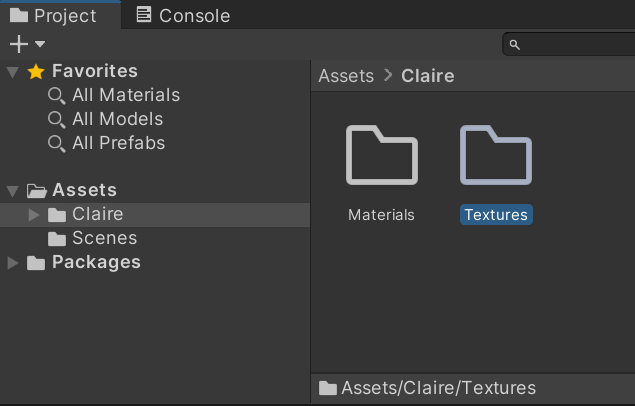
Create a folder for your character. In this case, I used “Claire”.
Create subfolders for “Materials” and “Textures”
Drag the character and two animations from your ‘downloads’ to the folder you created.
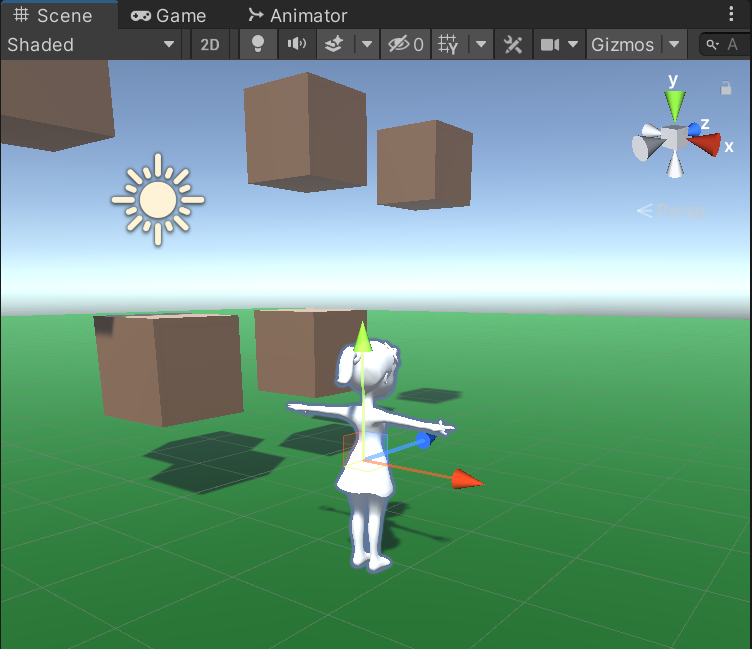
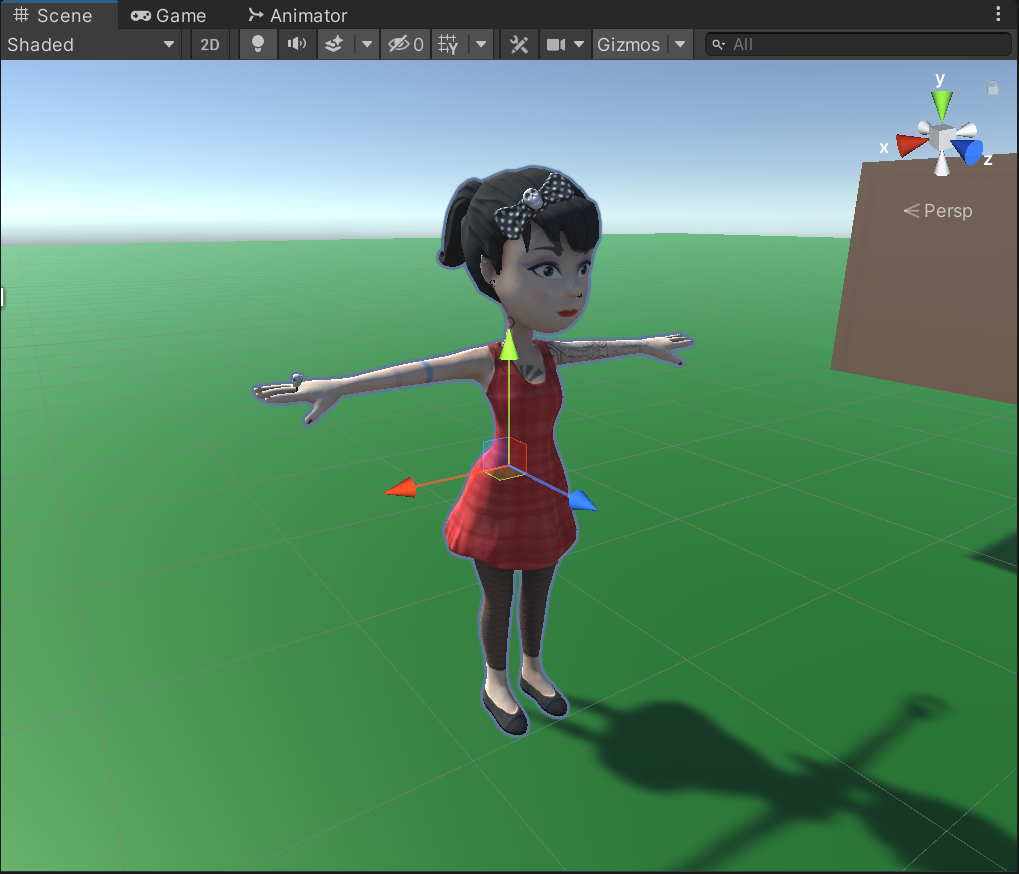
Drag the character from the assets to your scene. It will be white, as no textures ore materials have been applied yet.
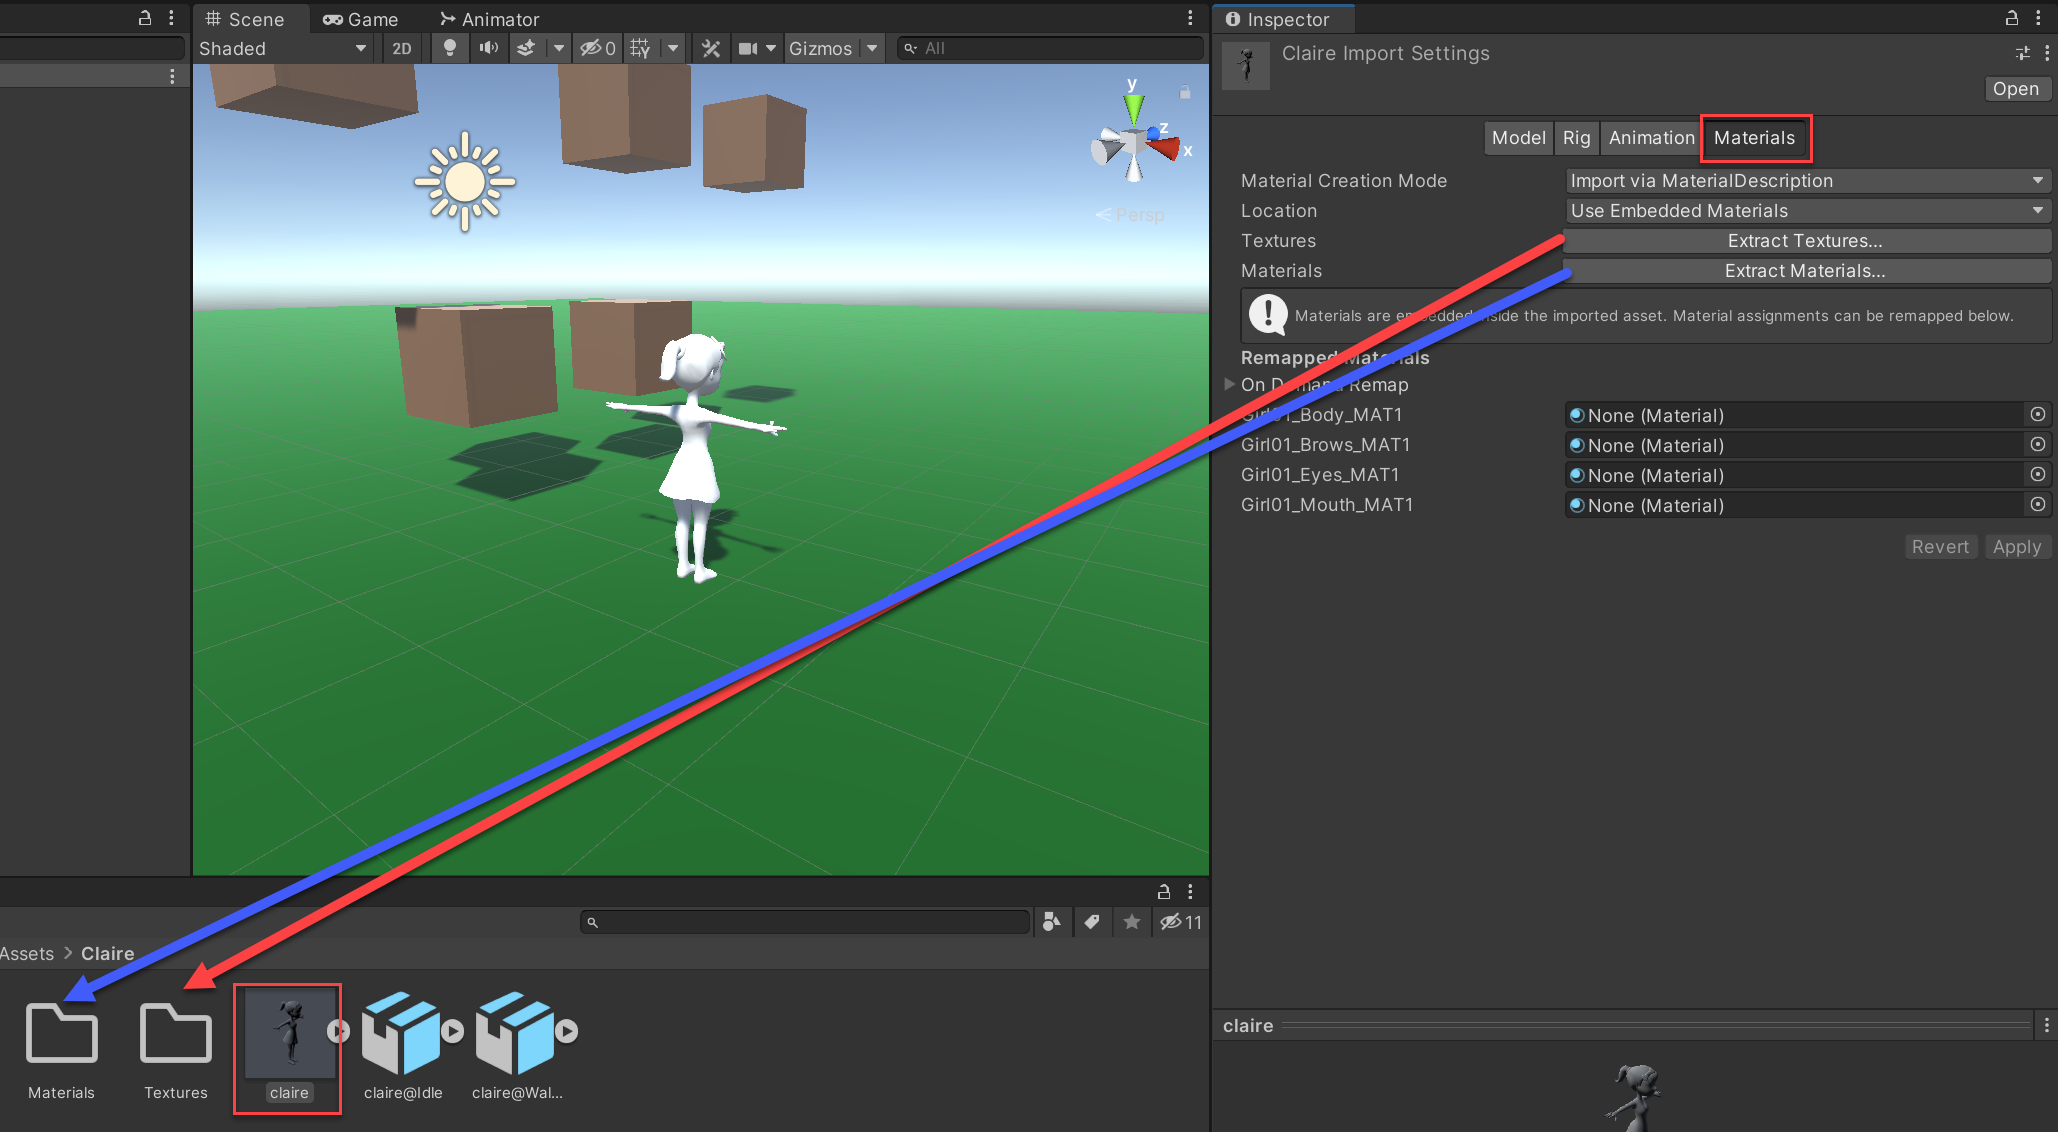
Next click on your character in Assets.
Select Materials in the Inspector panel.
Click “Extract Textures” and put them in the Textures folder we created.
Click “Extract Materials” and put them in the Materials folder we created.
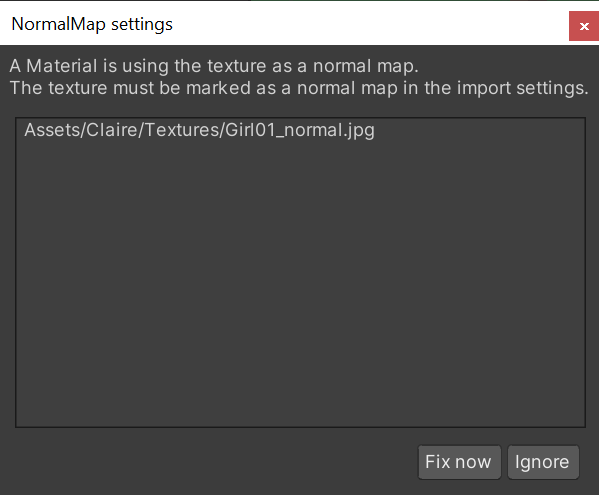
If you get a message like this, just go ahead and fix.
Now your character should look good.
Get Character to Move
Now we need to get the character to move around. We are going to use a character controller. It is more complex than rigid body physics, but offers more control.
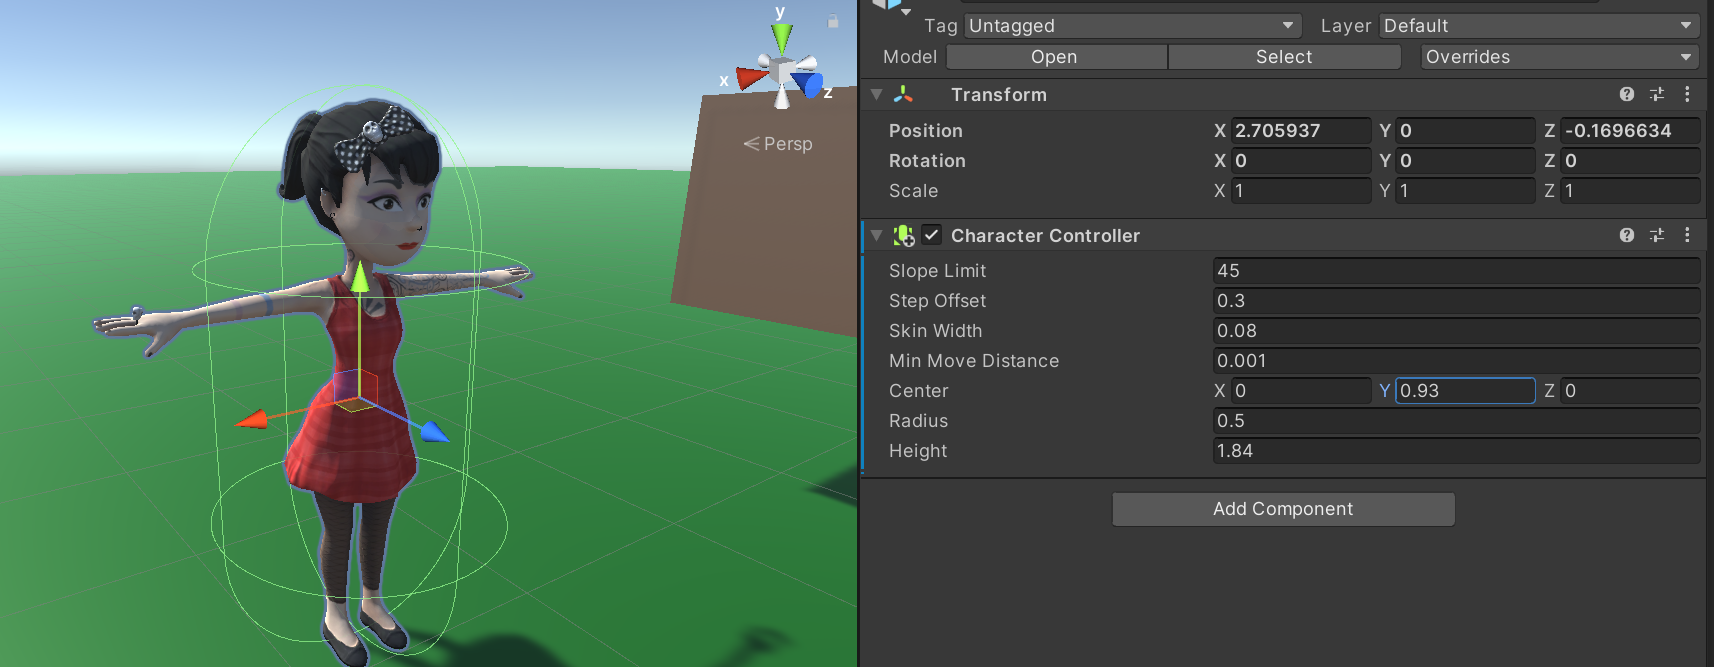
Add Character Controller
Select your character.
Select “Add Component” in the inspector.
Add a character controller.
The character controller has a ‘capsule’ for hitbox calculations. Adjust the size and positioning of this so it goes around your character.
Add Character Script
Make the camera a ‘child’ of the player and position behind the player.
Add this character script:
 1using System.Collections;
 2using System.Collections.Generic;
 3using UnityEngine;
 4
 5public class CharacterScript : MonoBehaviour
 6{
 7    [SerializeField] Transform playerCamera = null;
 8    [SerializeField] float mouseSensitivity = 3.5f;
 9    [SerializeField] float walkSpeed = 6.0f;
10    [SerializeField] float gravity = -13.0f;
11    [SerializeField] [Range(0.0f, 0.5f)] float moveSmoothTime = 0.3f;
12    [SerializeField] [Range(0.0f, 0.5f)] float mouseSmoothTime = 0.03f;
13
14    [SerializeField] bool lockCursor = true;
15
16    float cameraPitch = 0.0f;
17    float velocityY = 0.0f;
18    CharacterController controller = null;
19
20    Vector2 currentDir = Vector2.zero;
21    Vector2 currentDirVelocity = Vector2.zero;
22
23    Vector2 currentMouseDelta = Vector2.zero;
24    Vector2 currentMouseDeltaVelocity = Vector2.zero;
25
26    void Start()
27    {
28        controller = GetComponent<CharacterController>();
29        if (lockCursor)
30        {
31            Cursor.lockState = CursorLockMode.Locked;
32            Cursor.visible = false;
33        }
34    }
35
36    void Update()
37    {
38        UpdateMouseLook();
39        UpdateMovement();
40    }
41
42    void UpdateMouseLook()
43    {
44        Vector2 targetMouseDelta = new Vector2(Input.GetAxis("Mouse X"), Input.GetAxis("Mouse Y"));
45
46        currentMouseDelta = Vector2.SmoothDamp(currentMouseDelta, targetMouseDelta, ref currentMouseDeltaVelocity, mouseSmoothTime);
47
48        cameraPitch -= currentMouseDelta.y * mouseSensitivity;
49        cameraPitch = Mathf.Clamp(cameraPitch, -90.0f, 90.0f);
50
51        playerCamera.localEulerAngles = Vector3.right * cameraPitch;
52        transform.Rotate(Vector3.up * currentMouseDelta.x * mouseSensitivity);
53    }
54
55    void UpdateMovement()
56    {
57        Vector2 targetDir = new Vector2(Input.GetAxisRaw("Horizontal"), Input.GetAxisRaw("Vertical"));
58        targetDir.Normalize();
59
60        currentDir = Vector2.SmoothDamp(currentDir, targetDir, ref currentDirVelocity, moveSmoothTime);
61
62        if (controller.isGrounded)
63            velocityY = 0.0f;
64
65        velocityY += gravity * Time.deltaTime;
66
67        Vector3 velocity = (transform.forward * currentDir.y + transform.right * currentDir.x) * walkSpeed + Vector3.up * velocityY;
68
69        controller.Move(velocity * Time.deltaTime);
70
71    }
72}
While the character does not animate yet, it should be able to move with mouse and WASD keys.
Animate
Add Armature Rigs
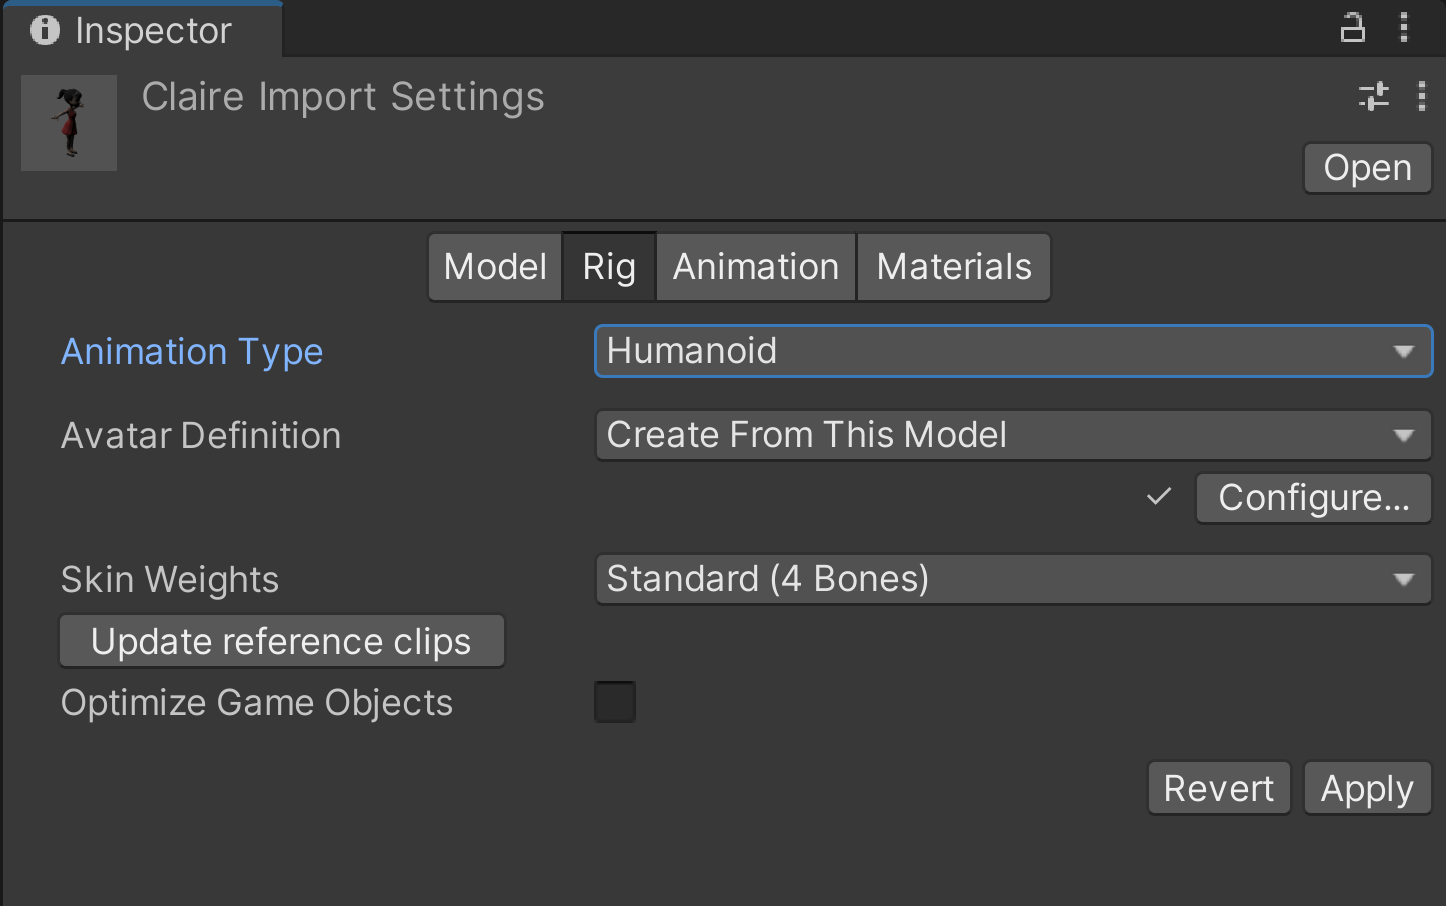
Select your character in the assets folder.
In the “Inspector” tab, select “Rig”.
Select “Humanoid”
Select “Create From This Model”.
Select “Apply”
Select the “Idle” animation.
In the “Inspector” tab, select “Rig”.
Select “Humanoid”
Select “Copy From Other Avatar”.
Double-click on “Source” and select the avatar you just created
Select “Apply”
Repeat for the “Walk” animation.
There may be warnings. That’s ok.
Add Idle Animation
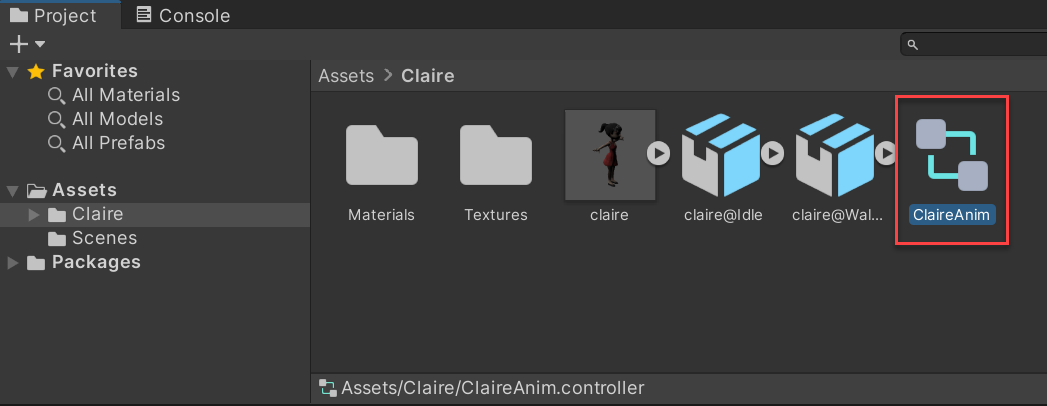
Click on your character folder in assets, and add an Animator Controller.
Double click on the animator controller to edit it. Then drag the idle animation to the controller.
Drag the animator controller to your player object. Run. The player should now display the idle animation.
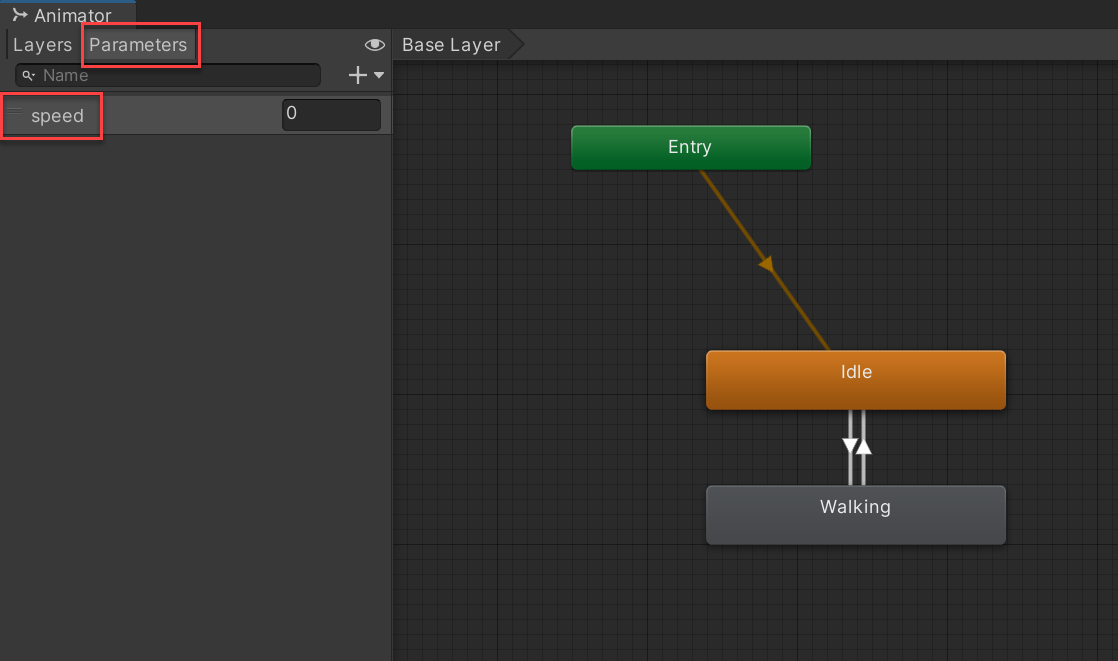
Add Speed Parameter
We will need to transition from idle to walking based on speed. We need to update our character controller to spit this out. Here’s our updates:
 1using System.Collections;
 2using System.Collections.Generic;
 3using UnityEngine;
 4
 5public class CharacterScript : MonoBehaviour
 6{
 7    [SerializeField] Transform playerCamera = null;
 8    [SerializeField] float mouseSensitivity = 3.5f;
 9    [SerializeField] float walkSpeed = 6.0f;
10    [SerializeField] float gravity = -13.0f;
11    [SerializeField] [Range(0.0f, 0.5f)] float moveSmoothTime = 0.3f;
12    [SerializeField] [Range(0.0f, 0.5f)] float mouseSmoothTime = 0.03f;
13    Animator _animator;
14
15    [SerializeField] bool lockCursor = true;
16
17    float cameraPitch = 0.0f;
18    float velocityY = 0.0f;
19    Vector3 velocity = Vector3.zero;
20
21    CharacterController controller = null;
22
23    Vector2 currentDir = Vector2.zero;
24    Vector2 currentDirVelocity = Vector2.zero;
25
26    Vector2 currentMouseDelta = Vector2.zero;
27    Vector2 currentMouseDeltaVelocity = Vector2.zero;
28
29    void Start()
30    {
31        _animator = GetComponentInChildren<Animator>();
32        controller = GetComponent<CharacterController>();
33        if (lockCursor)
34        {
35            Cursor.lockState = CursorLockMode.Locked;
36            Cursor.visible = false;
37        }
38    }
39
40    void Update()
41    {
42        UpdateMouseLook();
43        UpdateMovement();
44        float speedPercent = velocity.magnitude / walkSpeed;
45        _animator.SetFloat("speed", speedPercent);
46    }
47
48    void UpdateMouseLook()
49    {
50        Vector2 targetMouseDelta = new Vector2(Input.GetAxis("Mouse X"), Input.GetAxis("Mouse Y"));
51
52        currentMouseDelta = Vector2.SmoothDamp(currentMouseDelta, targetMouseDelta, ref currentMouseDeltaVelocity, mouseSmoothTime);
53
54        cameraPitch -= currentMouseDelta.y * mouseSensitivity;
55        cameraPitch = Mathf.Clamp(cameraPitch, -90.0f, 90.0f);
56
57        playerCamera.localEulerAngles = Vector3.right * cameraPitch;
58        transform.Rotate(Vector3.up * currentMouseDelta.x * mouseSensitivity);
59    }
60
61    void UpdateMovement()
62    {
63        Vector2 targetDir = new Vector2(Input.GetAxisRaw("Horizontal"), Input.GetAxisRaw("Vertical"));
64        targetDir.Normalize();
65
66        currentDir = Vector2.SmoothDamp(currentDir, targetDir, ref currentDirVelocity, moveSmoothTime);
67
68        if (controller.isGrounded)
69            velocityY = 0.0f;
70
71        velocityY += gravity * Time.deltaTime;
72
73        velocity = (transform.forward * currentDir.y + transform.right * currentDir.x) * walkSpeed + Vector3.up * velocityY;
74
75        controller.Move(velocity * Time.deltaTime);
76
77    }
78}
Now in the Animator, we should be able to add speed:
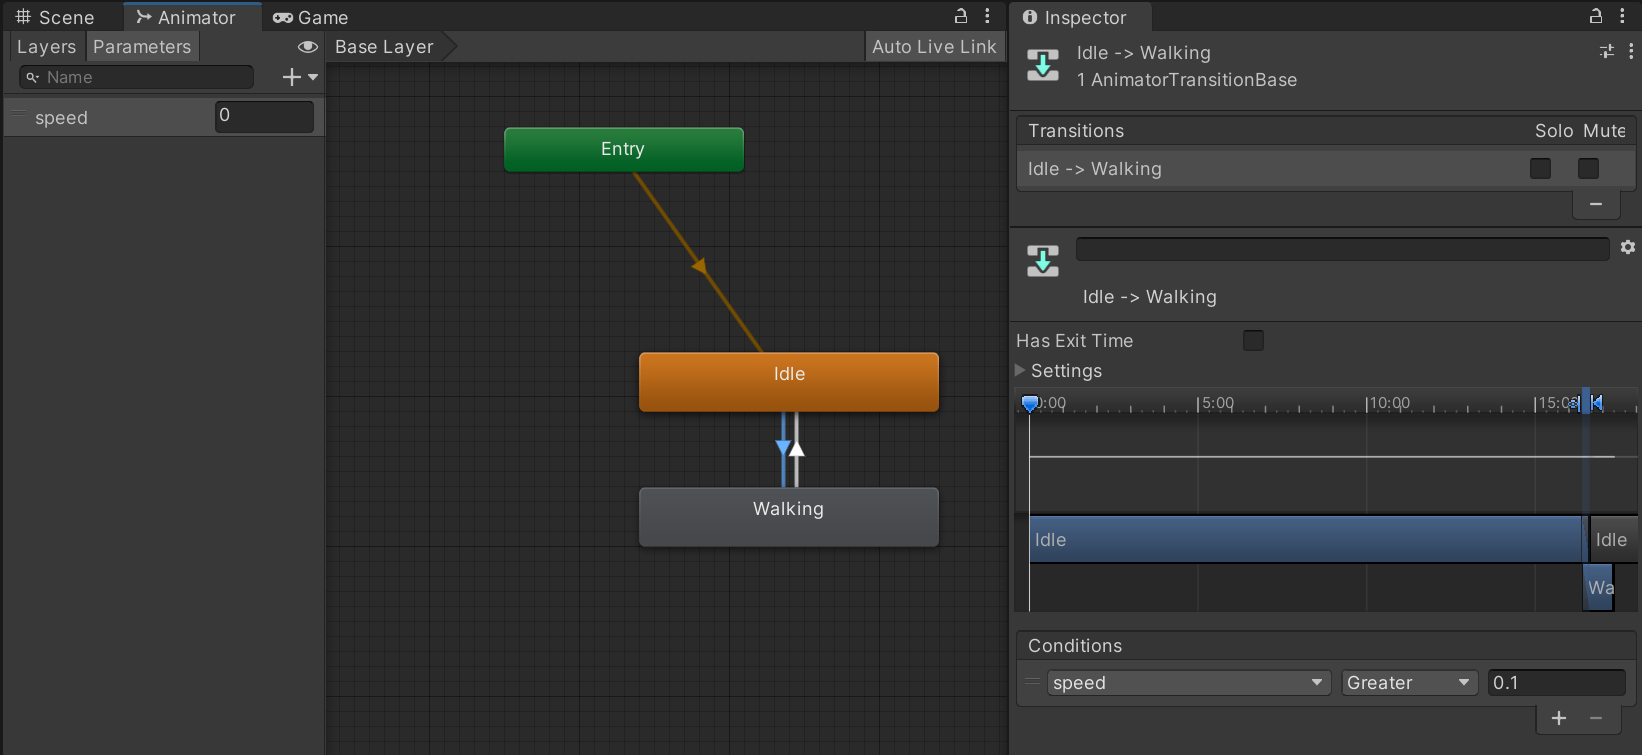
Then we can add in our “walk” animation. Add transitions, and make it based on speed. Greater than 0.3, we animate. Less than 0.3, we idle.
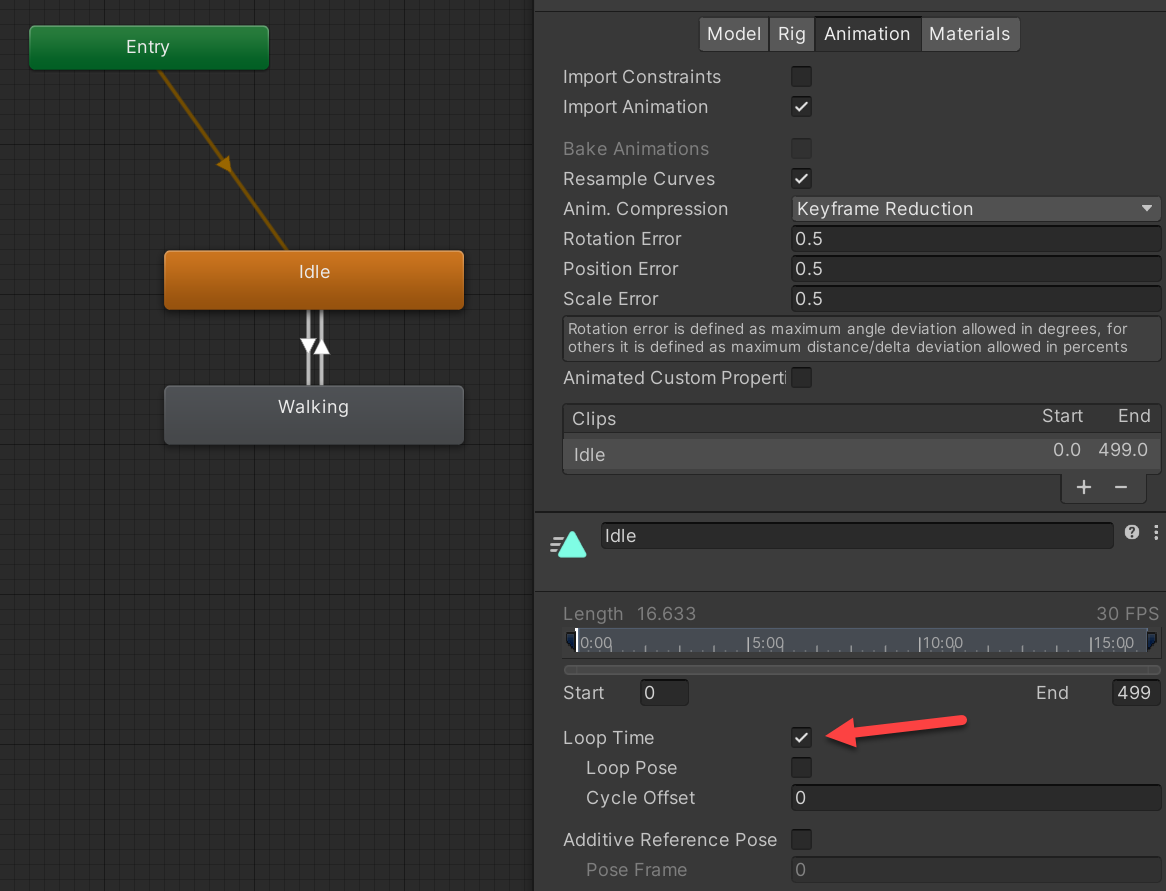
Right now, the animations will only run once. Double-click between both animations and make sure that “Loop Time” box is checked for both animations.
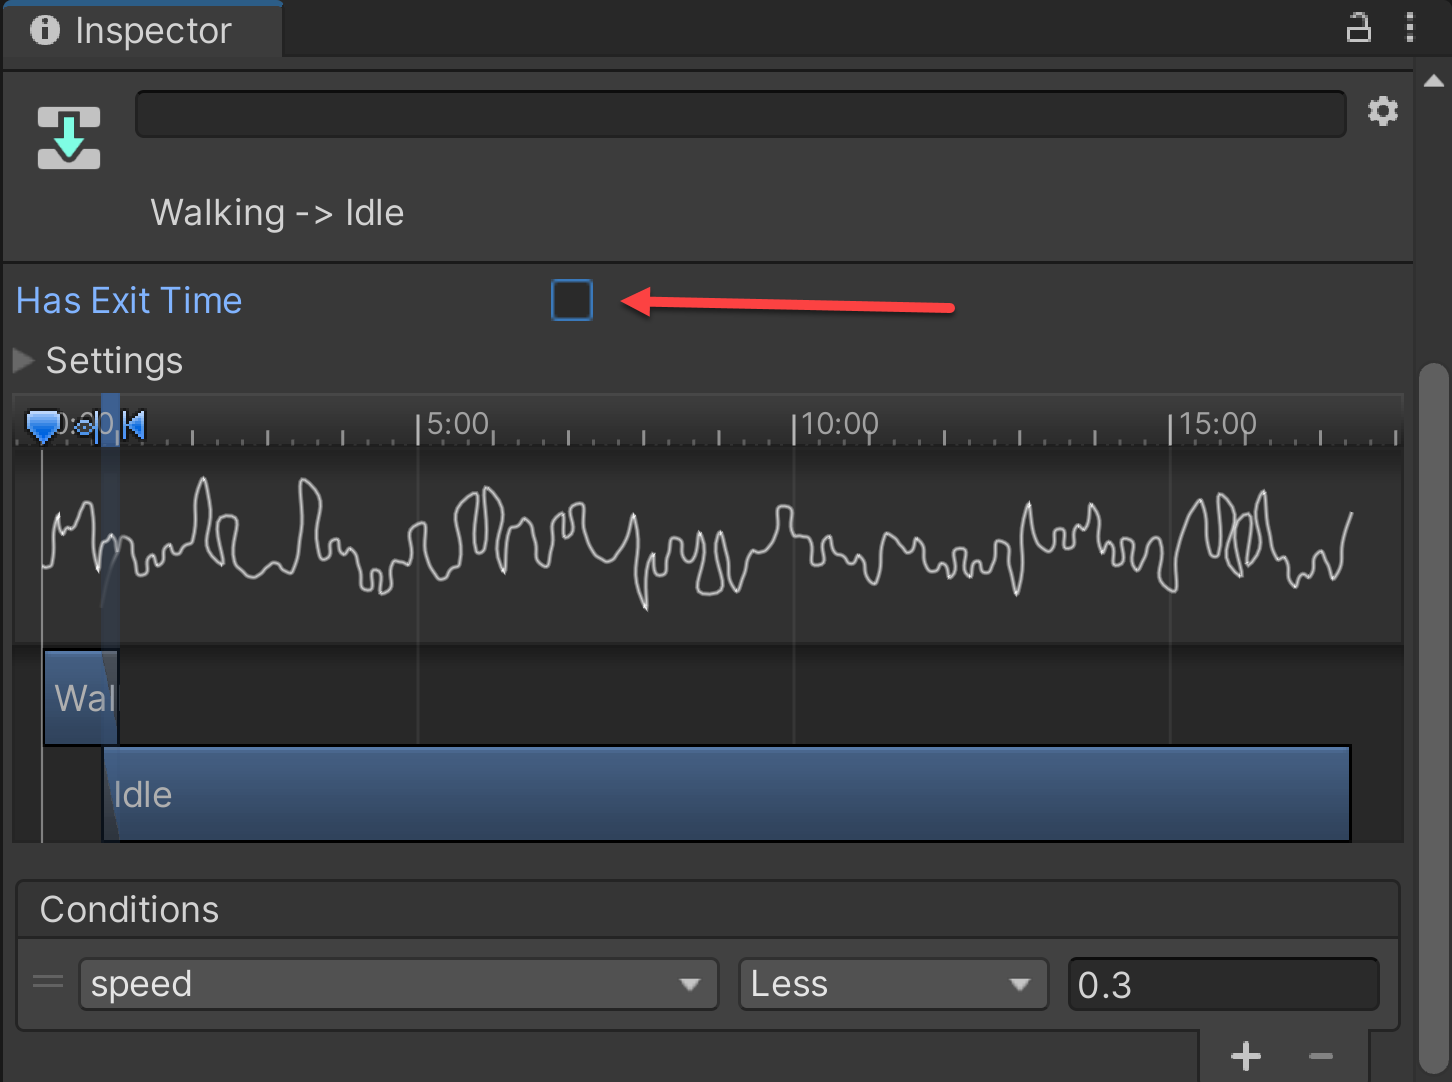
Also, the animations won’t transition until they are done. Flip between both animations and uncheck “Has Exit Time.”
Uncheck Root Motion
Depending on your animation, the animation can move the character. Typically it works best if it is just an animation. Select your character, and in the “Animator” section, uncheck root motion:

References
Acacia Developer. First Person Controller. Sep 10, 2020
Acacia Developer. Unity FPS Controller code. Sep 10, 2020
Niklas Bergstrand. Adding walk and run animation in Unity. May 19, 2021